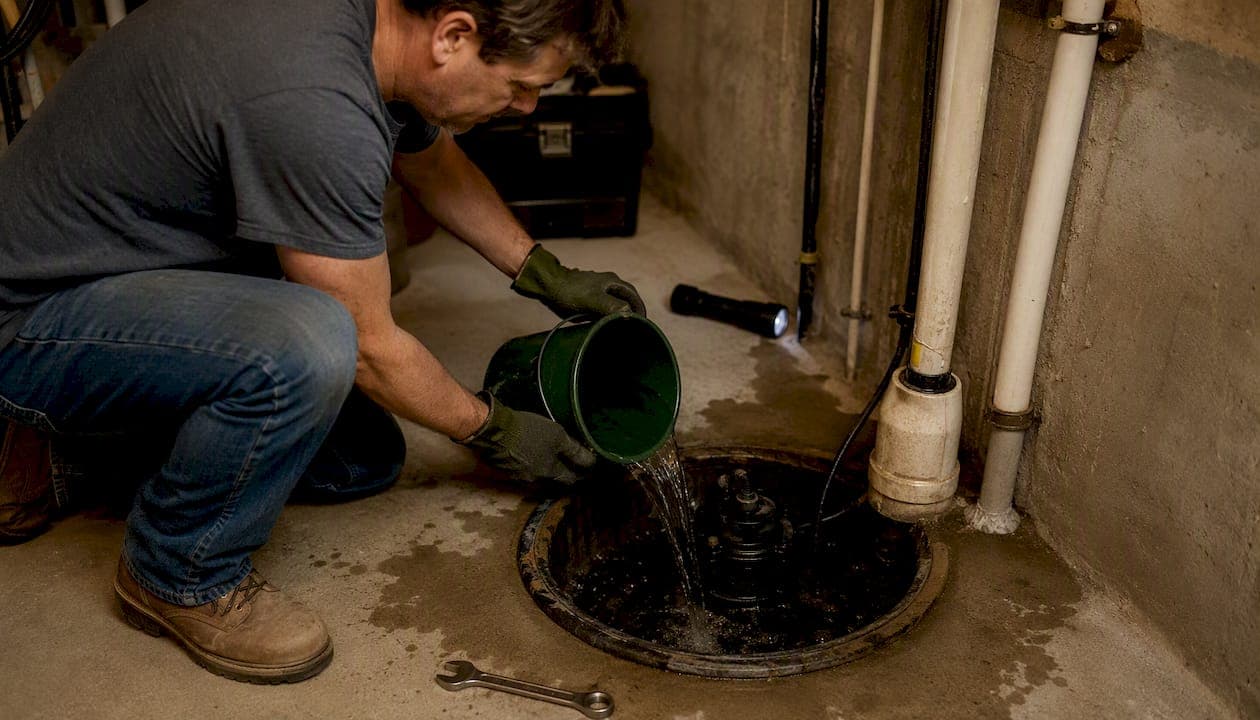
Check your sump pump monthly with a quick visual and a pour-water test, go deeper every quarter, and schedule a full service once a year. Those three tiers cover the vast majority of failures before they happen. The three actions that matter most right now: confirm power and run a pour-water activation test, clean debris from the pit, and verify your battery backup is charged and functional.
Your core schedule at a glance:
- Monthly (5 minutes, DIY): Visual inspection, GFCI power check, pour-water activation test, listen for unusual noise.
- Quarterly (20–30 minutes, DIY with basic tools): Float switch check, discharge line and check valve inspection, inlet screen cleaning, verify automatic start/stop.
- Annual (1–2 hours, homeowner + professional): Full pit cleaning, pump removal and seal inspection per manufacturer manual, battery backup service, professional inspection.
If your pump runs frequently, handles washing machine drainage, or your property sits in a high-rainfall region, bump monthly checks to weekly and add a second professional visit each year.
Key Takeaways
A consistent sump pump maintenance schedule, monthly quick checks, quarterly deeper inspections, and an annual professional service, is the most reliable way to prevent basement flooding and extend pump life.
| Point | Details |
|---|---|
| Monthly check is non-negotiable | Run a pour-water test and confirm GFCI power every month; it takes under five minutes. |
| Float and pit are the top DIY priorities | Check float movement and clear pit debris quarterly to prevent the most common failure mode. |
| Annual pro inspection pays for itself | Professional service ($100–$250) catches electrical and mechanical issues homeowners can't safely test. |
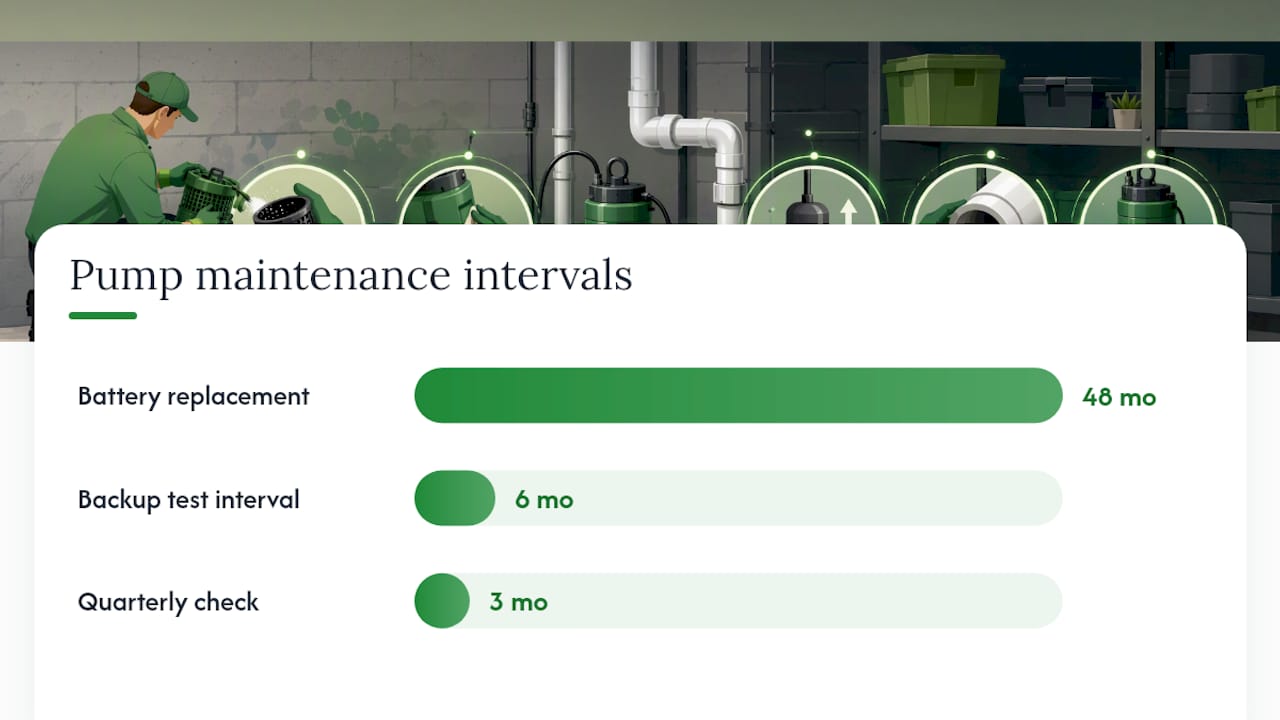
| Battery backup needs its own schedule | Load-test the backup at least twice a year and replace sealed lead-acid batteries every 3–5 years. |
| Mypropertycommandcenter centralizes it all | Use the platform's alerts, vendor directory, and document vault to keep every property's pump schedule on track. |
Table of Contents
- Sump pump maintenance schedule: what to do and when
- Detailed checklist by frequency: monthly, quarterly, and annual
- How to safely test a sump pump and what a normal cycle looks like
- Battery backups, secondary pumps, and alarms: keeping them ready
- Common failure modes, quick fixes, and red flags
- How long sump pumps last and when to replace one
- When to hire a professional and what it costs
- Safety rules and why the manufacturer's manual comes first
- Make maintenance stick: logs, reminders, and a simple template
- What most homeowners get wrong about sump pump upkeep
- Mypropertycommandcenter keeps your pump schedule on track
- Sources
Sump pump maintenance schedule: what to do and when
| Frequency | Task | Who Does It |
|---|---|---|
| Monthly | Visual check, GFCI test, pour-water activation test, listen for noise | Homeowner |
| Quarterly | Float switch, discharge line, check valve, inlet screen, auto start/stop | Homeowner with basic tools |
| Before spring storms | Full activation test, discharge line clear, pit debris removal | Homeowner |
| Before winter | Check exposed discharge lines for freeze risk, test backup power | Homeowner |
| Annual | Deep pit clean, pump inspection per manual, battery service, pro inspection | Homeowner + professional |
| As needed | After any heavy storm event or extended pump run cycle | Homeowner |
When to increase frequency: Pumps that run more than a few times per week, serve as a washing machine drain, or sit in basements with a history of flooding deserve monthly deep checks rather than quarterly ones. The same applies after any major storm season. Seasonal timing matters too: test before spring rains hit and inspect discharge lines before the first hard freeze, since a blocked or frozen discharge line is one of the most common winter failures.
Pro Tip: Set recurring calendar reminders the first weekend of each month for the quick check, and the first weekend of March, June, September, and December for quarterly service. Pairing these with another routine task, like changing HVAC filters, makes them stick.
Detailed checklist by frequency: monthly, quarterly, and annual
Monthly quick check
- Inspect the pit visually. Look for standing water above normal levels, debris, or anything that could snag the float.
- Confirm power. Check that the pump is plugged in and the GFCI outlet has not tripped. Press the test/reset button on the outlet.
- Listen. Run the pump briefly and listen for grinding, rattling, or a motor that hums without moving water.
- Pour-water activation test. Slowly pour a bucket of water into the pit until the float rises and the pump kicks on. Watch it discharge and shut off cleanly. This is the single most reliable homeowner test, and it confirms both activation and discharge in one step.
- Check the discharge outlet outside. Walk to where the pipe exits the house and confirm water is actually coming out during the test.
Safety note: Never put your hands in the pit while the pump is plugged in.
Quarterly deeper check
- Float switch: Lift the float by hand (pump unplugged) and confirm it moves freely with no gunk or debris binding it. Free float movement is one of the three core homeowner maintenance actions — a stuck float is the most common reason a pump fails to start.
- Discharge line and check valve: Trace the discharge pipe and look for cracks, loose fittings, or signs of backflow. The check valve should hold water in the pipe when the pump stops; if water drains back loudly, the valve may need replacement.
- Inlet screen: Remove and rinse the screen at the pump's base to clear sediment and small debris.
- Auto start/stop under load: Run the pour-water test again, this time watching the full cycle: pump starts, discharges, shuts off, and does not immediately restart.
Annual deep service
The annual service is where you go beyond observation and actually handle the pump. A 12-point annual checklist covers the full scope of what a thorough service should include, from pit cleaning to electrical inspection.
- Unplug the pump completely before touching it.
- Remove the pump from the pit (most submersible models lift straight out).
- Rinse the pump exterior and clear any buildup from the intake.
- Inspect seals, bearings, and the impeller per your manufacturer's manual. This step is model-specific; the manual overrides any general guidance here.
- Clean the pit thoroughly: remove all sediment, gravel, and debris.
- Reinstall the pump, confirm it sits level, and rerun the pour-water test.
- Test and service the battery backup (see Section 5).
- Schedule a professional inspection if you skipped one last year.
Pro Tip: Keep your manufacturer's manual in the same physical location as the pump, or scan it and store it digitally. The lubrication and seal-service steps vary significantly by model, and skipping model-specific steps can void your warranty.
How to safely test a sump pump and what a normal cycle looks like
The pour-water method is the standard homeowner test for good reason: it replicates real conditions without waiting for rain.
Step-by-step pour-water test:
- Locate the float switch and note its current resting position.
- Slowly pour 3–5 gallons of water directly into the pit, not onto the pump motor.
- Watch the float rise. The pump should activate before the water reaches the top of the pit.
- Go outside and confirm water is exiting the discharge pipe.
- Stop pouring and let the pump run until it shuts off automatically.
- The whole cycle, from activation to shutoff, should take under two minutes for a normally functioning pump.
What a normal cycle looks like: The motor starts smoothly (no stuttering), water exits the discharge at a steady flow, and the pump shuts off cleanly once the float drops. If the pump runs for more than three or four minutes on a small test fill, the discharge may be partially blocked or the pump is losing capacity.
Electrical checks to run alongside the test:
- Press the GFCI test button, confirm the outlet cuts power, then reset it.
- Inspect the power cord for cracks, fraying, or heat damage near the plug.
- Dry-trip the float: with the pump plugged in and the pit dry, manually lift the float to the "on" position and confirm the motor starts. Lower it and confirm it stops.
Troubleshooting triggers from a failed test:
- No activation: Check power first (GFCI, cord, outlet). If power is confirmed, the float switch or motor may have failed.
- Slow or weak discharge: Inspect the discharge line for blockage or a failed check valve.
- Pump runs but never shuts off: The float is likely stuck in the "on" position. Unplug, clear debris around the float, and retest.
- Short cycling (starts and stops rapidly): Often a check valve issue allowing water to drain back into the pit immediately.
Battery backups, secondary pumps, and alarms: keeping them ready
A primary pump that loses power during a storm is exactly when you need a backup most. Most homeowners discover their battery backup is dead only when it matters.
Battery backup test procedure:
- Disconnect the primary pump from power to simulate an outage.
- Trigger the backup by pouring water into the pit as you would for a normal test.
- Confirm the backup pump activates and discharges.
- Check the battery's indicator light or use a multimeter to verify voltage (most sealed lead-acid backup batteries should read 12.6V or higher when fully charged).
- Reconnect the primary pump and confirm it resumes normal operation.
Run this test at least twice a year, and always after any extended power outage that forced the backup to run.
Backup types and what they're good for:
- Battery backup pumps: The most common option. They run independently of your water supply and work during power outages. Batteries typically need replacement every 3–5 years, though actual life depends on how often the backup runs.
- Water-powered backup pumps: No battery to maintain, but they require adequate municipal water pressure and consume tap water while running. Not suitable for well-water systems.
- Secondary (redundant) pump: A second submersible pump installed in the same pit at a slightly higher trigger point. Activates if the primary fails or is overwhelmed. Requires its own power circuit.
Alarm testing:
- High-water alarms alert you when the pit level rises above normal, which usually means the primary pump has failed. Test the alarm by lifting its float sensor manually.
- Smart alarms can send text or app notifications. If your alarm integrates with a property management platform, confirm the alert routing is active and pointed at a current phone number.
Pro Tip: Write the battery installation date on a piece of tape stuck directly to the battery. When you open the lid for a quarterly check, the date is right there. No guessing, no searching through old receipts.
Common failure modes, quick fixes, and red flags
Most sump pump failures trace back to a handful of causes, and several of them are fixable in under ten minutes.
Common problems and quick DIY fixes:
- Stuck float switch: Debris or slime builds up around the float and holds it down. Fix: unplug the pump, clear the debris, and confirm free movement before plugging back in.
- Clogged intake screen: Sediment blocks the screen at the pump base. Fix: remove the pump, rinse the screen under running water.
- Tripped GFCI: A moisture event or power surge trips the outlet. Fix: press the reset button. If it trips again immediately, call an electrician.
- Blocked discharge line: Ice, debris, or a pest nest blocks the exterior outlet. Fix: clear the obstruction from the outside. In winter, check for ice and insulate exposed sections.
- Dead backup battery: Battery voltage has dropped below functional range. Fix: replace the battery. Most sealed lead-acid units are available at hardware stores.
- Corroded check valve: Backflow noise after pump shutoff, or water draining back into the pit. Fix: replace the check valve (a straightforward DIY job on most systems).
Red flags that mean stop and call a professional:
- The motor smells like burning or gets hot to the touch during a short test run.
- The pump short-cycles repeatedly even after you've cleared the float and check valve.
- You see water or corrosion on the electrical connections or the outlet itself.
- The pump runs continuously for more than 15–20 minutes without the pit level dropping.
- You hear grinding or metal-on-metal sounds from inside the motor housing.
These symptoms point to motor failure, electrical faults, or a pump that is undersized for the current water volume. None of them are safe to diagnose with hands-on DIY work.
How long sump pumps last and when to replace one
Most submersible sump pumps last 7–10 years under normal residential use. Pedestal pumps, which keep the motor above the waterline, often last longer, sometimes 25 years or more, because the motor stays dry. Heavy use, poor maintenance, and corrosive groundwater all shorten that window.
Replacement criteria to watch for:
- The pump is more than 7–10 years old and has never been serviced.
- You've repaired the same component (float, check valve, impeller) more than twice in two years.
- Discharge flow has noticeably weakened compared to when the pump was new.
- Run times are getting longer for the same water volume.
- Visible corrosion on the pump body, fittings, or motor housing.
- The pump failed during a storm and you had to intervene manually.
Selecting a replacement:
Match the new pump's horsepower and flow rate (measured in gallons per hour) to your pit size and typical water volume. A 1/3 HP pump handles most residential applications, but a basement with heavy groundwater infiltration or a large pit may need 1/2 HP or more. Check your local building codes for discharge line requirements, and always read the new pump's manual before installation to understand warranty conditions. Property managers overseeing multiple homes should log each pump's installation date and model so replacement cycles can be planned rather than reactive.
When to hire a professional and what it costs
Most pumps should be inspected by a professional at least once a year, and twice a year if the pump runs frequently or the property has a history of water intrusion. A professional visit is not a replacement for your own monthly checks; it is the layer that catches what you can't see or safely test yourself.
What a professional inspection typically covers:
- Full pit cleaning and sediment removal
- Flow test under load to measure actual discharge capacity
- Electrical inspection: wiring, GFCI, and motor draw
- Check valve and discharge pipe inspection for leaks or backflow
- Float switch calibration and free-movement confirmation
- Battery backup load test and voltage verification
- Written service report with findings and recommended next steps
Typical cost: Professional sump pump cleaning and inspection runs roughly $100–$250, depending on your region and what the inspection uncovers. If the technician finds a failed check valve or a battery that needs replacement, parts and labor add to that baseline.
Questions to ask when booking a pro:
- Do you provide a written inspection report?
- Does the service include a battery backup test?
- What is your call-out fee if the pump fails between scheduled visits?
- Are you licensed and insured for plumbing or mechanical work in this state?
For property managers coordinating service across multiple homes, scheduling recurring vendor contracts in advance, similar to the approach used for building exterior maintenance, keeps inspections from slipping through the cracks during busy seasons.
Safety rules and why the manufacturer's manual comes first
General maintenance schedules, including this one, are starting points. Your pump's manufacturer manual is the final authority for anything model-specific.
Safety rules before any hands-on work:
- Unplug the pump completely before reaching into the pit or handling the pump body.
- Never submerge a pedestal-style pump; the motor is not rated for water contact.
- Wear waterproof gloves when cleaning the pit; groundwater can carry bacteria and contaminants.
- Keep a dry towel nearby and never work near the pump with wet hands and a live outlet.
- If you smell gas or see any sign of electrical arcing, leave the area and call a professional.
Manufacturer manuals are the supreme authority for bearing lubrication, seal service, and any procedure that touches the motor internals. Following a generic guide for a step your manual handles differently can void your warranty and cause premature failure. When in doubt, call the manufacturer's support line or hire a technician familiar with your specific model.
One-sentence warranty rule: Follow your pump's model-specific instructions for every internal service step, or have a licensed professional perform those steps on your behalf.
Make maintenance stick: logs, reminders, and a simple template
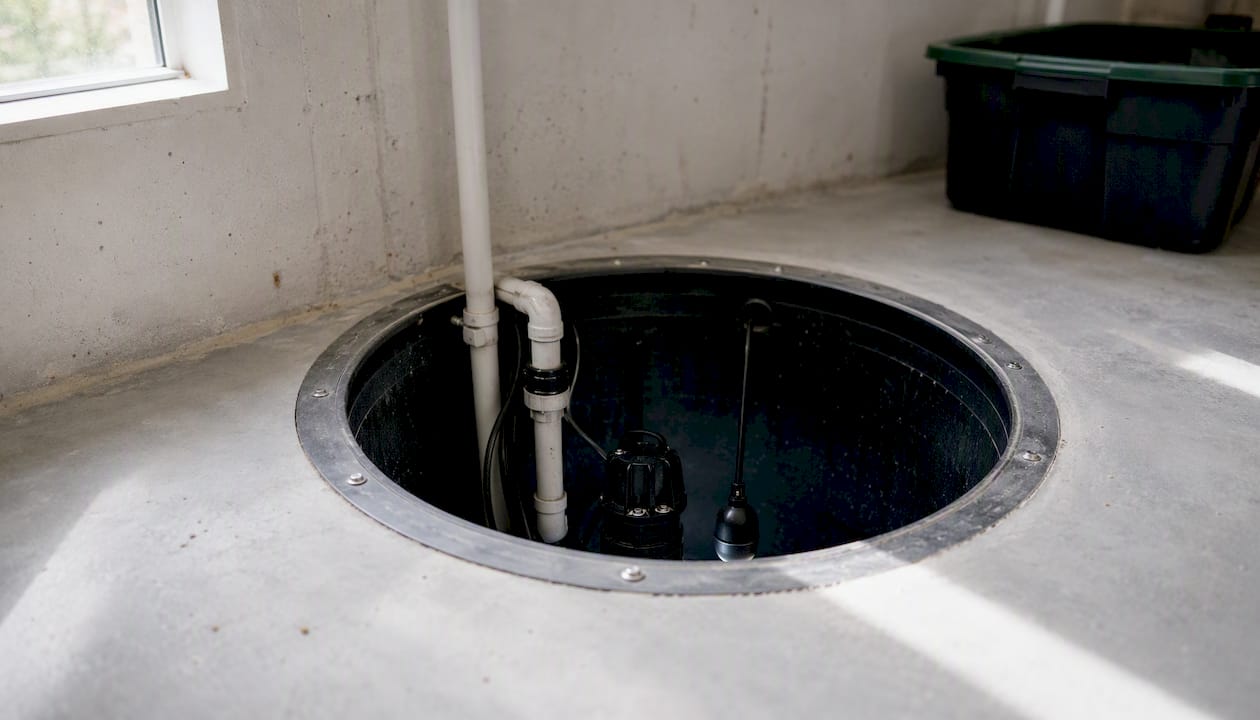
A schedule you can't track is a schedule you'll skip. A simple log takes two minutes to fill in and gives you a paper trail that's genuinely useful when a pump fails or you're deciding whether to replace it.
Maintenance log fields to track:
- Date of service
- Task performed (monthly check, quarterly, annual, etc.)
- Findings (normal / abnormal, and brief description)
- Pump runtime during test (seconds or minutes)
- Battery status (voltage or indicator reading)
- Action taken (cleared debris, reset GFCI, replaced battery, called pro)
- Next service due date
Sample log entry:
Reminder cadence that works:
Tie reminders to existing routines. Monthly pump checks pair naturally with monthly HVAC filter changes or water filter replacements. Quarterly checks align with the change of seasons. Annual service fits naturally in March, before spring rains, or in October, before winter.
For property managers handling multiple homes, a centralized reminder system prevents any single property from falling behind. Logging run-hours and incidents across properties also helps identify pumps that are approaching end-of-life faster than their age alone would suggest.
Pro Tip: Scan your pump's manual, warranty card, and purchase receipt and store them in a digital document vault. Mypropertycommandcenter's document vault keeps these files attached to the specific property, so you're never hunting through email when a technician asks for the model number at 7 AM during a storm.
What most homeowners get wrong about sump pump upkeep
The maintenance schedule itself is rarely the problem. Most homeowners who experience a pump failure during a storm had done something to maintain their pump. The issue is usually one of three gaps: they skipped the battery backup test entirely, they cleaned the pit but never checked the float for free movement, or they assumed "no problems yet" meant "no problems coming."
Battery checks get skipped because the backup sits dormant for months and feels fine. It isn't fine. A sealed lead-acid battery that hasn't been load-tested in two years may read a healthy voltage on a multimeter but collapse under actual load within minutes. That's the scenario that floods basements.
The float check is equally underrated. A float that moves freely in a clean pit can seize up in weeks if the pit accumulates the right mix of sediment and slime. Monthly visual checks catch this; quarterly hands-on checks confirm it. Neither takes more than a few minutes, and both are things most guides mention but few readers actually do consistently.
The broader point: a sump pump maintenance schedule works only if it's tied to a system that sends reminders and tracks what was done. A note on a calendar you ignore is not a system.
Mypropertycommandcenter keeps your pump schedule on track
Tracking monthly, quarterly, and annual pump checks across one property is manageable. Across two or three homes, vacation rentals, or short-term rental properties, it gets complicated fast, and the gaps are where floods happen.

Mypropertycommandcenter gives you a single dashboard where every property's maintenance schedule lives in one place. Set recurring maintenance alerts for monthly pump checks and quarterly service, store your pump manuals and warranty receipts in the document vault, and keep your plumber or pump technician's contact in the vendor directory so you're never searching for a number during an emergency. When the battery replacement reminder fires, the manual is already there. No spreadsheets, no scattered notes. Start a 14-day free trial at Mypropertycommandcenter and have your first pump schedule set up before the week is out.
Sources
The recommendations in this article draw from the following sources. For any model-specific maintenance step, your pump manufacturer's manual takes precedence over general guidance.
- Sump Pump Maintenance: 7 Steps to Prevent Water Damage
- Sump Pump Maintenance Checklist 2026: 12 Annual Steps (Printable)
- General Sump Pump Maintenance and Cleaning Tips
- Sump Pump Maintenance for Flood-Free Basement - Roto-Rooter
Your pump's manufacturer manual is the primary authority for lubrication, seal service, and any internal maintenance step. When general guidance and your manual conflict, follow the manual.