
A rental turnover checklist is a sequenced workflow, inspect, scope, repair, clean, photograph, list, that turns a vacated unit into a rent-ready one in the fewest days possible. Skip the sequence, and you get rework: painters redoing walls after cleaners already wiped them down, or listing photos shot before the leaky faucet got fixed. Most turns run within a range of several days depending on damage and vendor availability, but the order you work in matters more than how fast any single step goes.
TL;DR:
- Proper sequencing of inspection, repairs, and cleaning is crucial to minimize rework and shorten the overall turnaround time.
- Functional repairs such as plumbing leaks and electrical hazards must be fixed before cosmetic work like painting or flooring begins.
- Complete safety checks, including smoke and CO detector tests and lock reprogramming, before re-renting to ensure legal compliance and habitability.
- Accurate documentation of damage, left-behind items, and costs helps prevent disputes and aids future budgeting and decision-making.
- Centralized recordkeeping and vendor coordination across multiple units streamline turnovers and prevent delays caused by miscommunication or lost information.
Table of Contents
- What Goes Into a Rental Turnover Checklist for Move-Out Inspection?
- How Should You Sequence Turnover Tasks After Inspection?
- What Repairs Should Come Before Cosmetic Work?
- What Does a Room-by-Room Cleaning Checklist Cover?
- What Safety and System Checks Are Required Before Re-Renting?
- How Do You Time Listing Photos and Move-In Logistics?
- How Do You Keep Turnovers Predictable Across Multiple Units?
- What Happens During the Final Walkthrough and Documentation Closeout?
- How Should You Handle Tenant Communication During Turnover?
- How Do You Handle Items Left Behind by a Tenant?
- What Legal and Disclosure Requirements Apply During Turnover?
- How Much Should a Rental Turnover Cost?
- How Long Should a Rental Turnover Take?
- A Habit Worth Building Into Every Turnover Season
- Keep Every Turnover Detail in One Place, Not Six
- Sources
What Goes Into a Rental Turnover Checklist for Move-Out Inspection?
The move-out inspection is where your entire scope gets built, so timing and documentation quality matter more than speed. Walk the unit promptly after vacancy while conditions are fresh and before anyone else touches anything. A standardized inspection with photos and a written condition report is the backbone of a reliable turnover, not an optional add-on.
Photograph every room using a consistent pattern: one wide shot of the whole space, then close-ups of any notable features, damage, or wear. Name files something like "property_unit_kitchen_stain_0312.jpg" so nobody has to guess what they're looking at three weeks later.
While you're in there, capture:
- Keys, fobs, and remotes returned (and which ones are missing)
- Utility meter readings at handoff
- Appliance condition: oven, fridge, dishwasher, washer/dryer
- Flooring, walls, and fixtures for damage versus normal wear
- Odors, which cameras can't catch but scope sheets should note
Normal wear (faded paint, minor carpet flattening) is different from damage (burns, holes, pet stains), and that distinction drives what gets billed to a deposit versus absorbed as routine maintenance.
How Should You Sequence Turnover Tasks After Inspection?
Sequencing is the single biggest lever for shortening a turn, because standardizing scope and work order reduces rework and cuts average turnaround time. Cleaners who show up before repairs are finished end up cleaning twice. Painters who arrive after new flooring risk overspray on surfaces nobody wants touched again.
A dependable order looks like this:
- Inspection and scope. Turn your walk-through notes into a written scope of work with specific tasks, not vague descriptions like "fix bathroom."
- Vendor estimates and scheduling. Send the scope to trades so pricing stays consistent across units and turns.
- Repairs and maintenance. Structural, mechanical, and safety items go first.
- Painting and flooring. These generate dust and debris, so they precede cleaning.
- Deep cleaning. Only after every dusty or messy task is done.
- Final photos and listing. Shot after the unit is genuinely show-ready, not before.
Split tasks into two buckets: things that must finish before marketing (safety, functional systems, cleanliness) and things that can wait (a fence stain touch-up, a garage light fixture upgrade). Using a standardized scoping template across units keeps vendor quotes consistent and makes it easier to spot when someone's overcharging.
What Repairs Should Come Before Cosmetic Work?
Functional problems get fixed before anything cosmetic, full stop. A freshly painted wall over an active leak is wasted money. Work through repairs in this order of urgency:
- Plumbing leaks — even slow drips can rot subflooring within weeks
- Electrical hazards — exposed wiring, dead outlets, flickering fixtures
- HVAC function — a broken system in July or January is a habitability issue, not a maintenance ticket
- Structural or safety items — loose railings, damaged steps, door locks that don't latch
- Cosmetic touch-ups — paint, trim, hardware finish, last
For replace-versus-repair decisions, weigh the item's remaining useful life against repair cost. A water heater at year 11 with a minor leak is a replacement candidate; a two-year-old unit with a failed thermocouple is a repair. Batch small jobs, filter swaps, bulb replacements, cabinet hardware, into a single vendor visit instead of paying a trip charge four separate times.
Pro Tip: Keep a standing turnover kit stocked with HVAC filters, light bulbs, smoke detector batteries, and basic hardware. A five-minute drive to the hardware store to grab one missing part can add a full day to your timeline if it happens more than once per turn.
What Does a Room-by-Room Cleaning Checklist Cover?
Cleaning happens last, after every repair, paint job, and flooring task generates its final speck of dust. Do it earlier and you're paying for a second pass.
Kitchen: Clean inside the oven and fridge, wipe down cabinet interiors and exteriors, disinfect countertops, and run a snake or enzyme treatment through sink drains that carry old grease buildup.

Bathrooms: Scrub grout lines, polish fixtures, check caulk around tubs and sinks for cracking, and inspect under sinks and behind toilets for mold before anyone paints over it.
Living areas and bedrooms: Wipe baseboards, replace any burned-out bulbs, dust blinds slat by slat, and vacuum flooring edges where robot vacuums and quick sweeps always miss.
Exterior and curb appeal: Sweep the entry and porch, trim overgrown landscaping, clean or replace a dented mailbox, and power wash walkways if the budget allows.
Cleaning crews should walk in last, after every trade has cleared out. A unit that looks spotless in photos but had cleaners working around wet paint is a unit that'll need another cleaning pass before a tenant moves in.
What Safety and System Checks Are Required Before Re-Renting?
A handful of checks protect you legally and cut down on the service calls that show up in a new tenant's first week.
- Test every smoke and CO detector, log battery replacement dates, and replace units older than 10 years
- Swap HVAC filters and write the next replacement date on the unit or in your records
- Inspect the water heater for corrosion or leaks and run water through every drain to check flow
- Rekey or reprogram locks between tenants and reset any smart-access codes
Fire and carbon monoxide detector checks aren't just good practice, most state and local codes require working detectors as a condition of occupancy, and skipping this step is one of the fastest ways to end up in a habitability dispute.
How Do You Time Listing Photos and Move-In Logistics?
Marketing photos only go live after cleaning and staging are complete, not before. A listing shot with tools still on the counter or a half-finished paint job undersells the unit and sets the wrong expectation for a prospective tenant.
Set your availability date around realistic completion, including a day or two of vendor buffer, rather than the date you hope everything wraps up. Overpromising a move-in date creates friction you'll spend the next two weeks apologizing for.
Before handoff, assemble a digital leasing packet:
- Final photos and the completed condition report
- Utility account information and transfer instructions
- Move-in instructions covering trash pickup, parking, and building rules
Coordinate logistics ahead of time too: key or fob handoff, reserved parking or elevator slots for moving day, and any gate or access codes the new tenant will need on day one.
How Do You Keep Turnovers Predictable Across Multiple Units?
Consistency at scale comes down to recordkeeping and vendor coordination, not heroics. Keep every inspection photo, scope document, and invoice for a given turnover in one dated folder so nothing gets lost between the inspection and the final invoice three weeks later.
Batch similar vendor work across units when you can. Grouping tasks and coordinating multiple units at once reduces the number of separate mobilization fees you're paying and tightens the schedule. A shared vendor directory with contact info, rates, and past job notes cuts down the back-and-forth of tracking down "who did the HVAC work at Unit 4B last year?"
- Store photos, scopes, and invoices in one dated folder per turnover
- Group similar vendor tasks and set firm due dates
- Maintain a vendor directory with rates and job history
- Track live status and reminders in a single dashboard instead of scattered texts and spreadsheets
A dashboard that consolidates property status, maintenance schedules, vendor contacts, and documents in one place removes the need to dig through old emails or half-updated spreadsheets every time a unit turns over.
That kind of centralized view, rather than a folder here and a text thread there, is what separates an owner managing two units calmly from one drowning in five.
What Happens During the Final Walkthrough and Documentation Closeout?
Before releasing the unit to marketing, walk the punch list one more time and sign off that every item is genuinely complete, not "mostly done." A half-finished repair that slips through this check becomes a tenant complaint in week one.
Store your before-and-after photos, vendor invoices, and the original condition report using consistent file names so anyone on your team can find them later without asking. Record two numbers for every turn: days vacant and total make-ready cost. Tracking these figures over time is how you spot which units or vendors are consistently running slow or over budget.
- Verify and sign off the punch list before listing goes live
- File before/after photos and invoices under one consistent naming scheme
- Log days vacant and total cost per turn in a tracking sheet
- Keep documentation ready to support any deposit deduction or dispute
Good records here don't just protect you in a dispute. They're the only real data you'll have when it's time to decide whether a $15,000 renovation actually pencils out against another year of steady rent.
How Should You Handle Tenant Communication During Turnover?
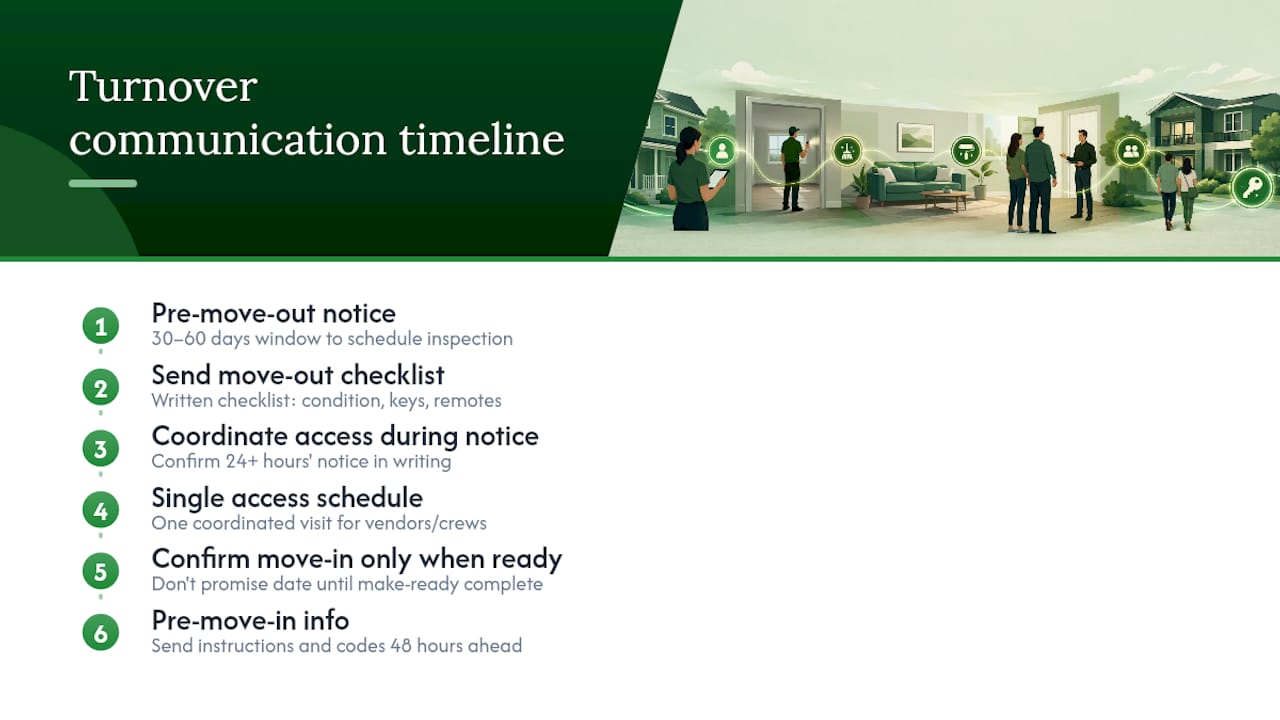
Turnover communication starts before the tenant even moves out, not the day after. Most leases require 30 to 60 days' written notice for a non-renewal or move-out, and that notice period is your window to schedule the inspection, line up vendors, and confirm access arrangements before the unit sits empty and unmanaged.
Send a written move-out checklist to the departing tenant that spells out expectations: what condition the unit should be left in, how to return keys, and where to leave garage remotes or mailbox keys. Vague verbal instructions lead to disputes over what "clean" meant.
Once the unit is vacant, coordinate access carefully if the outgoing tenant is still inside during a notice period. Give at least 24 hours' notice before entering for inspections or repairs unless your lease or state law sets a different standard, and always confirm the specific entry window in writing, even if it's just a text message you can reference later.
If you're bringing in cleaners, contractors, or inspectors while a tenant technically still occupies the unit, coordinate a single access schedule rather than sending multiple people on different days. Tenants get frustrated fast when three separate crews show up over a week for what could've been one coordinated visit.
For the incoming tenant, confirm the move-in date only once your make-ready work is genuinely complete, not based on an optimistic guess made three weeks earlier. Send move-in instructions, lease start details, and any access codes at least 48 hours ahead so their first day isn't spent waiting on a call back from you.
How Do You Handle Items Left Behind by a Tenant?
Abandoned property is one of the most common snags in a turnover, and how you handle it depends heavily on your state's abandoned property laws. Most states require landlords to store left-behind items for a set period, often somewhere between 7 and 30 days, and to make a documented attempt to notify the former tenant before disposing of anything.
Document everything left behind with photos and a written inventory during the same walk-through where you assess damage. This protects you if a tenant later claims something valuable was thrown out. Separate items into three categories: obvious trash (food, garbage, broken items), items of clear value (furniture, electronics, personal documents), and anything ambiguous that's worth photographing before deciding.
Send written notice to the tenant's last known address and, if you have it, a forwarding address, stating what was found and the deadline to claim it. Keep a copy of that notice with your turnover file. If the tenant doesn't respond by the deadline your state allows, you can typically dispose of, donate, or sell the items depending on local rules, but skipping the notice step is the most common mistake that turns into a small claims dispute later.
Build a simple disposal policy you apply consistently across every unit: same notice period, same storage approach, same documentation. Consistency here matters almost as much as the specific rule you pick, because an inconsistent policy is what actually gets landlords in trouble when a tenant challenges it.
What Legal and Disclosure Requirements Apply During Turnover?
Turnover work touches more legal territory than most owners expect, and skipping a disclosure step can cost far more than the repair itself would have. Requirements vary by state and even by city, so treat this section as a starting framework, not a substitute for checking your specific jurisdiction's rules.
Federal law requires disclosure of known lead-based paint hazards for any residential property built before 1978, along with providing tenants an EPA-approved pamphlet on lead hazards before they sign a lease. If your turnover work disturbs paint in an older building, that's also the moment to check whether lead-safe work practices apply to whoever's doing the repair.
Mold is handled differently: there's no single federal mold disclosure law, but many states require landlords to disclose known mold issues or address visible mold before re-renting, and habitability standards in nearly every state require a unit free of conditions that threaten health. If your inspection turns up mold, document it, remediate it, and keep records showing the work was done before the unit went back on the market.
Other common turnover-adjacent disclosures include:
- Known bed bug or pest history in some states and cities
- Registered sex offender proximity disclosures in a handful of jurisdictions
- Local rental registration or inspection requirements before a new lease can start
Check your state housing authority's website or a local landlord association for the specific disclosure forms required in your area before you finalize a new lease. What's required in one state can be entirely absent in the one next door.
How Much Should a Rental Turnover Cost?
Turnover costs swing widely based on unit condition, size, and how much of the work you do yourself versus hiring out, but building a budget category by category keeps surprises manageable. A checklist that ties tasks to their financial impact helps you prioritize spending where it actually protects your return, rather than spreading a fixed budget evenly across every line item.
Break your turnover budget into rough categories: cleaning (typically the smallest line item), paint and minor repairs (the most variable, since scope depends entirely on the outgoing tenant's care), flooring or carpet (a major cost only when replacement is unavoidable), appliance repair or replacement, and a safety/systems reserve for anything the inspection flags.
A light turn, minor cleaning, a touch-up coat of paint, a filter change, costs a fraction of a heavy turn involving flooring replacement or appliance failure. Track actual spend against your estimate for every turnover, even the easy ones, because that historical data is what lets you set realistic reserve targets for next year instead of guessing.
Two habits pay off here. First, get at least two vendor quotes for anything over a few hundred dollars until you've built enough history with a trade to trust their pricing. Second, review your turnover budget annually against actual spend, since recurring cost spikes (the same appliance failing across multiple units, for instance) often point to a systemic issue worth fixing at the source rather than repairing over and over.
How Long Should a Rental Turnover Take?
Most residential turnovers typically run within a range of several days from move-out to move-in ready, with the wide range coming almost entirely from damage severity and vendor scheduling, not from how hard anyone's working. A light cosmetic turn, cleaning, minor paint touch-up, filter swap, can realistically finish in 2 to 4 days. A heavy turn involving flooring replacement, appliance failure, or significant repair work can stretch past two weeks even with an efficient crew.
Build your timeline around milestones rather than a single end date: inspection and scope (day 1), vendor scheduling and repairs (days 2 through 5 or 6 depending on trade availability), painting and flooring (days 4 through 8 if needed), final cleaning (the day after all dusty work ends), and photos plus listing (same day as cleaning completion or the next morning).
The biggest timeline killer isn't any single task, it's gaps between tasks caused by poor scheduling. A painter who can't start until Thursday because nobody confirmed availability on Monday adds three dead days to a turn that should've taken one. Confirming vendor windows at the same time you finalize scope, rather than after, is the single easiest fix for shaving days off your average turn time.
Set a personal benchmark for your portfolio, track actual days vacant against it every turn, and revisit that benchmark once a year as vendor relationships and your own systems improve.
A Habit Worth Building Into Every Turnover Season
Review your checklist after your busiest season each year and adjust it based on what actually went wrong, not what the template says should happen. A milestone cadence with a quick post-season review catches recurring problems fast. Adapt every step here to your property type, climate, and asset class instead of running a one-size-fits-all script.
— Francisco
Keep Every Turnover Detail in One Place, Not Six
A checklist gets you organized for one turnover. What happens when you're juggling five units at once, each at a different stage, each with its own vendor waiting on a callback? That's where a paper checklist starts to break down and a centralized system earns its keep. A centralized platform consolidates property status, maintenance schedules, a vendor contact directory, and a document vault for warranties and inspection records into one dashboard, so nothing depends on you remembering which folder you saved last week's invoice in.
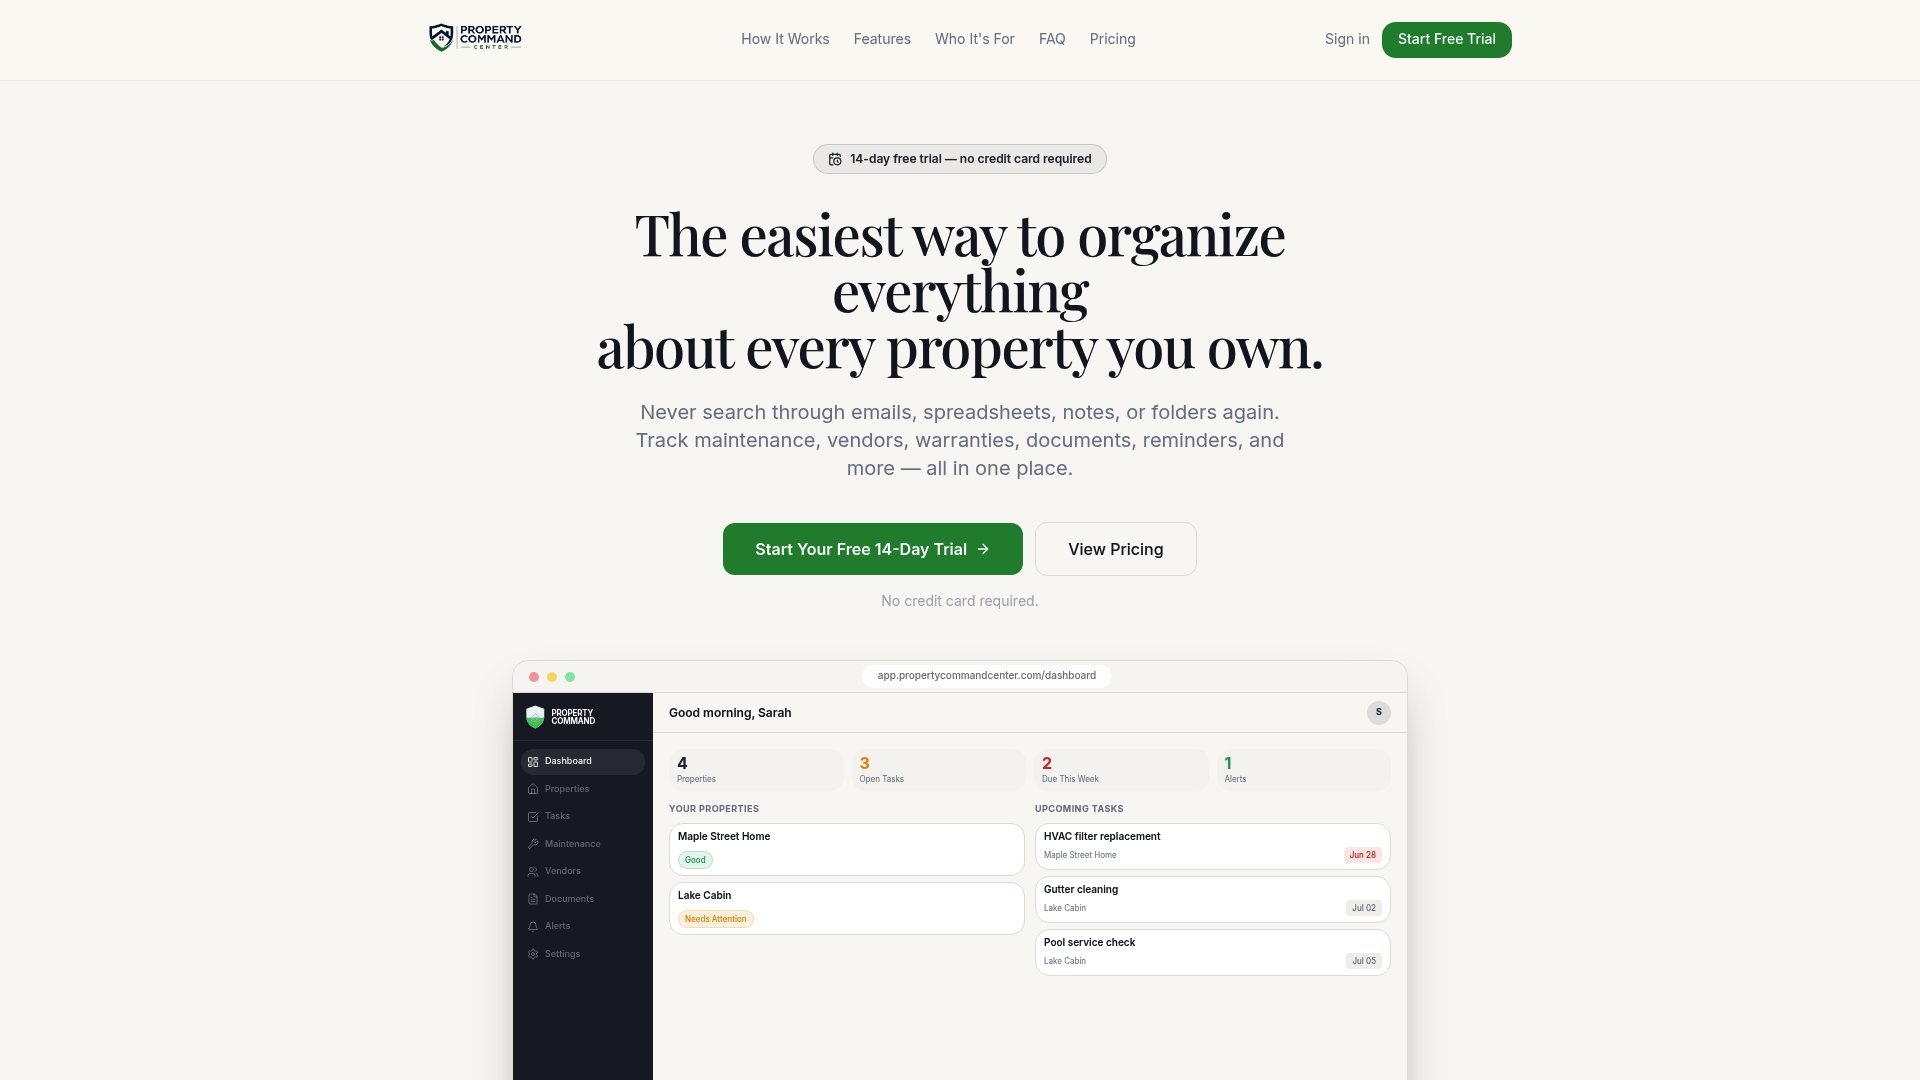
Centralizing that information shortens turnovers because nothing sits waiting on a missed reminder or a lost contact number, and it cuts down on the small items that slip through when you're managing multiple properties from scattered notes and email threads. If you manage vendor relationships across several units, the vendor directory keeps every contact and job history in one searchable place. Start a free trial and see what your next turnover looks like with everything tracked in one dashboard by checking the pricing plans.
Sources
- Guide to short-term rental turnover inspections
- Apartment Turnover: A Complete Guide for Property Managers
- Property management checklist: Daily, weekly & monthly tasks (BiggerPockets)
- Rental Turnover Checklist: The Best Order for Inspections, Photos, Cleaning, Repairs, and Leasing